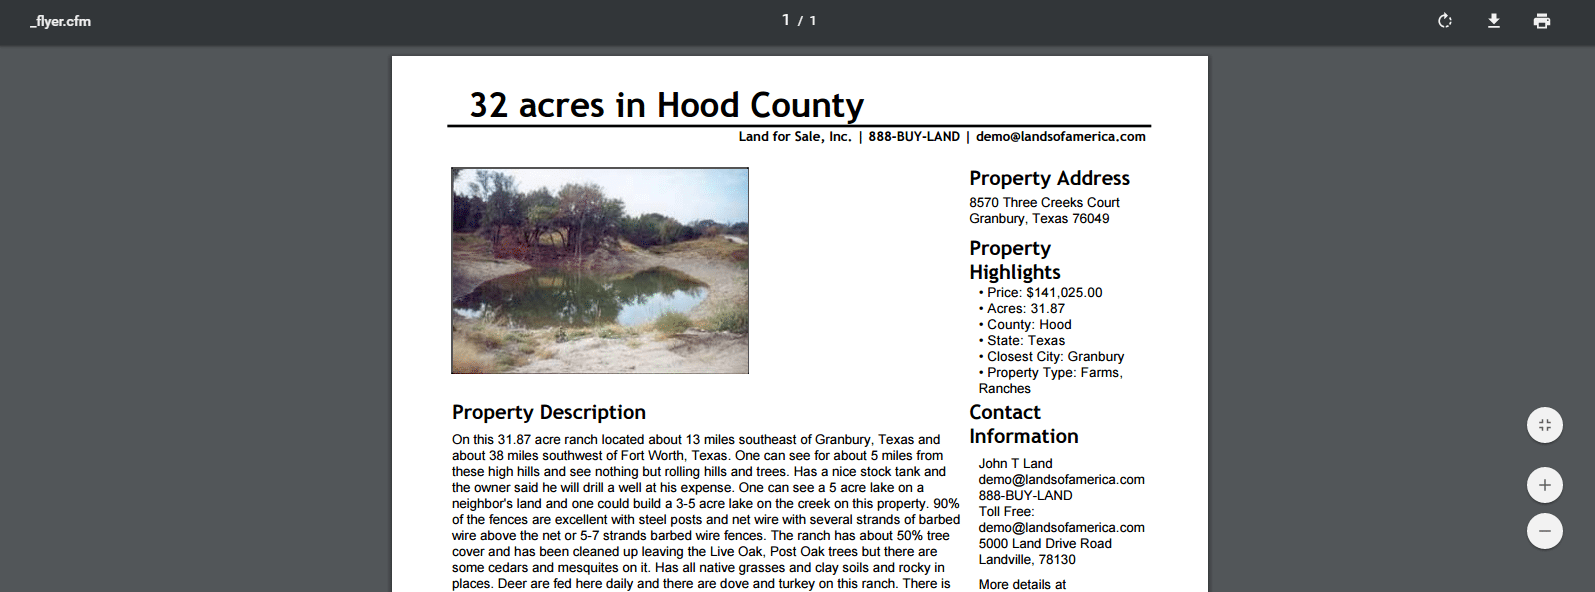
As a Lands of America paid seller, you have access to powerful seller tools, such as the Send a Flyer tool. You can use this tool to create a custom PDF flyer to send to a client, a potential buyer, or even print them out for an open house or an insert. Below are some tips for taking advantage of this feature.
How to Create a Custom Flyer
Each property entered onto the website comes with a flyer, but you can create a custom flyer for each property inside your account. To create a custom flyer, go to the Listings tab and select Add New Flyer. (you can also create a custom flyer by clicking Flyer on the left side when adding a new listing)
On the following page, select an active property then choose the property you would like to start with. The next page will bring up all the options that you can customize.
Flyer Layouts is a dropdown menu that allows you to choose different formats, and the option to include more pictures. Under Flyer Options, you can customize some of your color choices by using the color slider that pops up when you click the color you wish to modify.
Further down the page you can decide if you would like to display a company URL, property URL, email address, Realtor Image, and then choose the photos you would like to feature on the flyer and edit your property description. At the bottom of the page will be a Preview Flyer button. If you click on that, it will generate the custom layout at the bottom of the page. If everything is satisfactory, you may click on Publish Flyer, to make it live on the site and replace the default Flyer.
How to Create Bulk Custom Flyers For All Your Properties
The bulk flyer builder allows you to create custom flyers for all of your properties, using one basic layout. The property must have a main photo in order to create a flyer. You will go through all of the steps of creating a regular flyer, but this feature will generate the same format for each of your properties.
On this page, you can click on any of the boxes under Flyer Options, to change the colors of the text, the borders, and the backgrounds to suit your needs. Once you have chosen your optional colors, you can also choose which contact information you would like to include on your flyer. After you have selected the format, the colors, and text, click Preview Flyers to preview all flyers before publishing.
Once you are happy with the finished product, you can click Process Flyer and the new flyers will go live.
How to Email Flyers
This page allows one or more flyers to be sent to a list of buyers. Click on Flyers from the Listings tab, and then choose Email to Clients. There will be a menu that has a list of your created flyers to choose from. You can click to highlight your property, or hold down the Ctrl key, and select more than one to send. Below that will have your name and email address. Beneath that will be a box that asks you to enter in the email addresses (one per line) of the people you are sending these flyers to. If you have any additional comments to include, you can include them in the box labeled Comments. Once all is complete, you can click on the button that says Send Flyers at the bottom of the page.
How to Manage Your Flyers
To view, edit, or delete a custom flyer, go to the Listings tab and click Flyer List.
This page will show you a full list of all the properties you have created flyers for. Next to each one will be a column labeled Actions. In this column, you can choose whether you would like to Edit, View, or Delete the particular flyer. Once you click on the Edit button, you can make all of your necessary changes, and then hit Publish Flyer, afterward. The View button will show you how your flyer appears on the site. To remove the flyer completely and revert to the default flyer, just click on Delete.
